

How to Keep Your Emails Out of the Spam Folder: A Simple Guide to Great Email Deliverability
Mar 18, 2025Email marketing is one of the most effective ways to connect with your audience, but if your emails are landing in spam folders, they’re not doing you any good.
Ensuring email deliverability—making sure your emails actually reach your subscribers’ inboxes—requires more than just good content. It involves technical setup, sender reputation, and email list management.
If you’re preparing to launch email campaigns or start building an email list, here’s what you need to check first to avoid deliverability issues and protect your emails from being flagged as spam.
Step 1: Check Your Email Authentication Records
Before sending any marketing emails, you need to make sure your domain’s email authentication is set up correctly. This is what email providers (like Gmail, Outlook, and Yahoo) use to verify that your emails are legitimate.
Use Google’s MX Record Checker to quickly see if your domain is properly configured:
🔗 Check your MX records
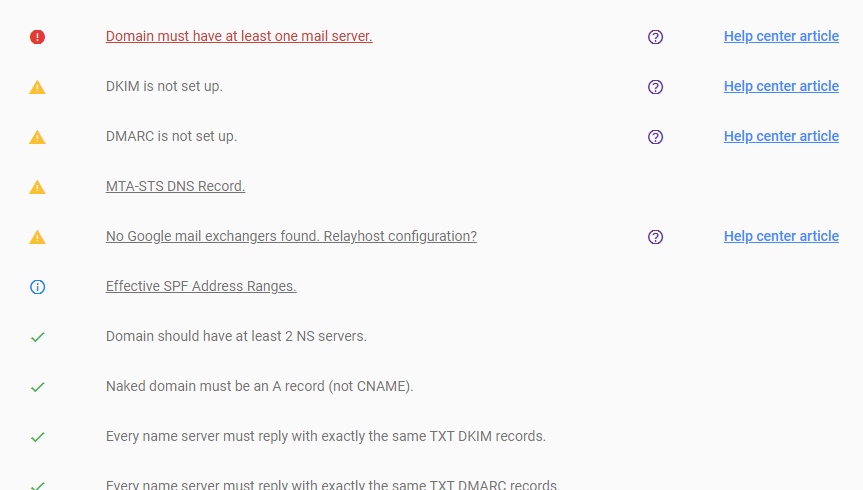
This tool helps you verify if your email settings align with best practices. If you get warnings or errors like the screenshot above, you’ll need to update your domain’s DNS records. Click on the information icon or the "Help center article" and it'll walk you through how to do that.
Step 2: Understanding the Acronyms – DKIM, SPF, and DMARC
If you’ve ever heard of DKIM, SPF, and DMARC but had no idea what they meant, here’s a simple breakdown:
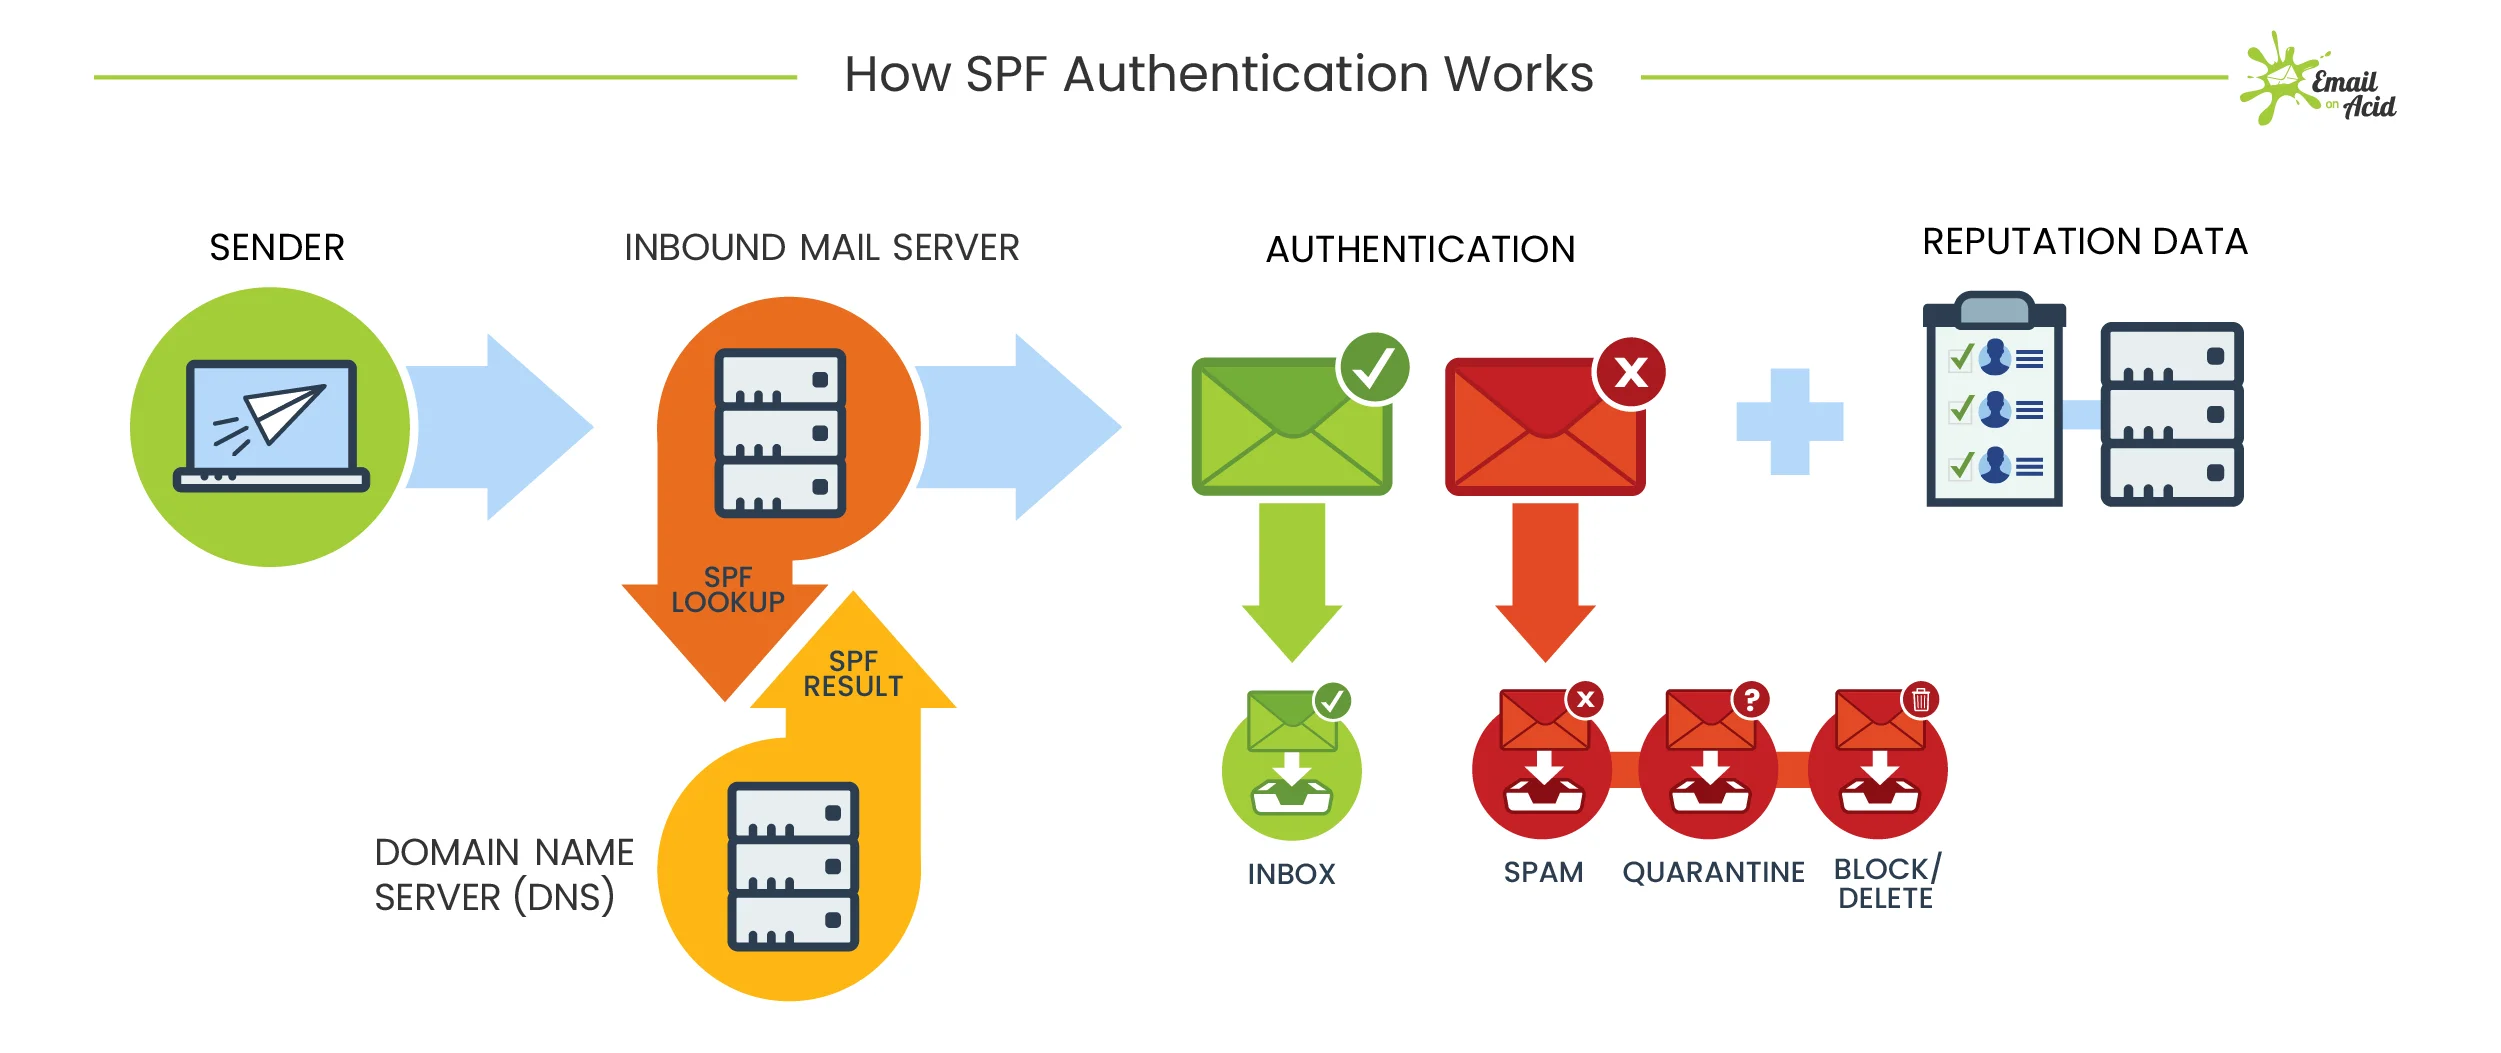
SPF (Sender Policy Framework)
SPF is like a “guest list” for your email domain. It tells email providers which servers are allowed to send emails on behalf of your domain.
👉 Without SPF, spammers can spoof (fake) your domain and send emails pretending to be you, which can damage your reputation.
How to Set It Up:
- Your domain provider (GoDaddy, Namecheap, Google Domains, etc.) should have a place to add TXT records in your DNS settings.
- A basic SPF record might look like this:
- This tells email providers that Google is allowed to send emails on your behalf.
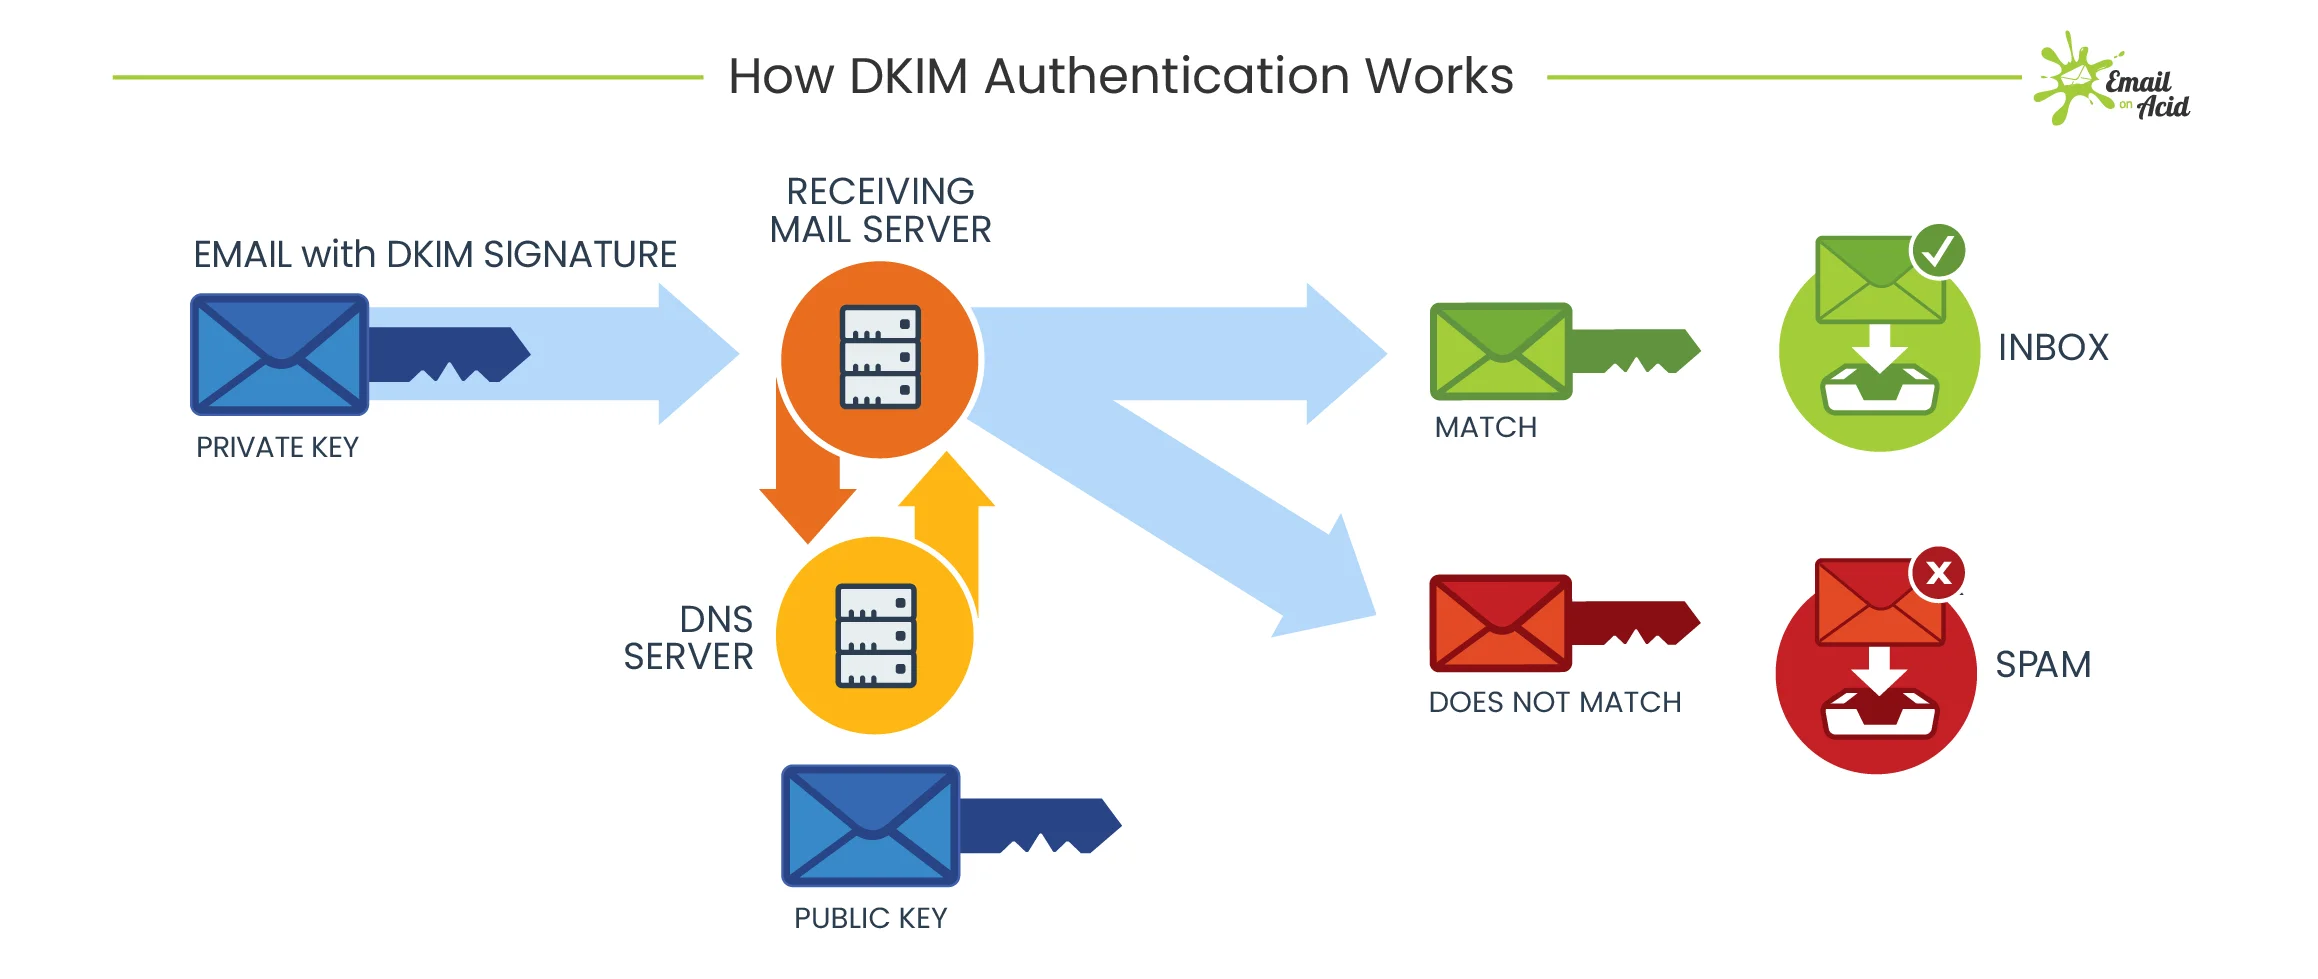
DKIM (DomainKeys Identified Mail)
DKIM is like a digital signature that proves your emails haven’t been tampered with.
👉 It adds a unique cryptographic signature to each email, allowing email providers to confirm that it was really sent from your domain and wasn’t altered in transit.
How to Set It Up:
- Go to your email provider’s settings (e.g., Google Workspace, Microsoft 365) and find the DKIM setup.
- Add the DKIM TXT record to your domain’s DNS settings.
- A DKIM record might look something like this:
Once set up, email providers verify your DKIM signature before delivering your emails.
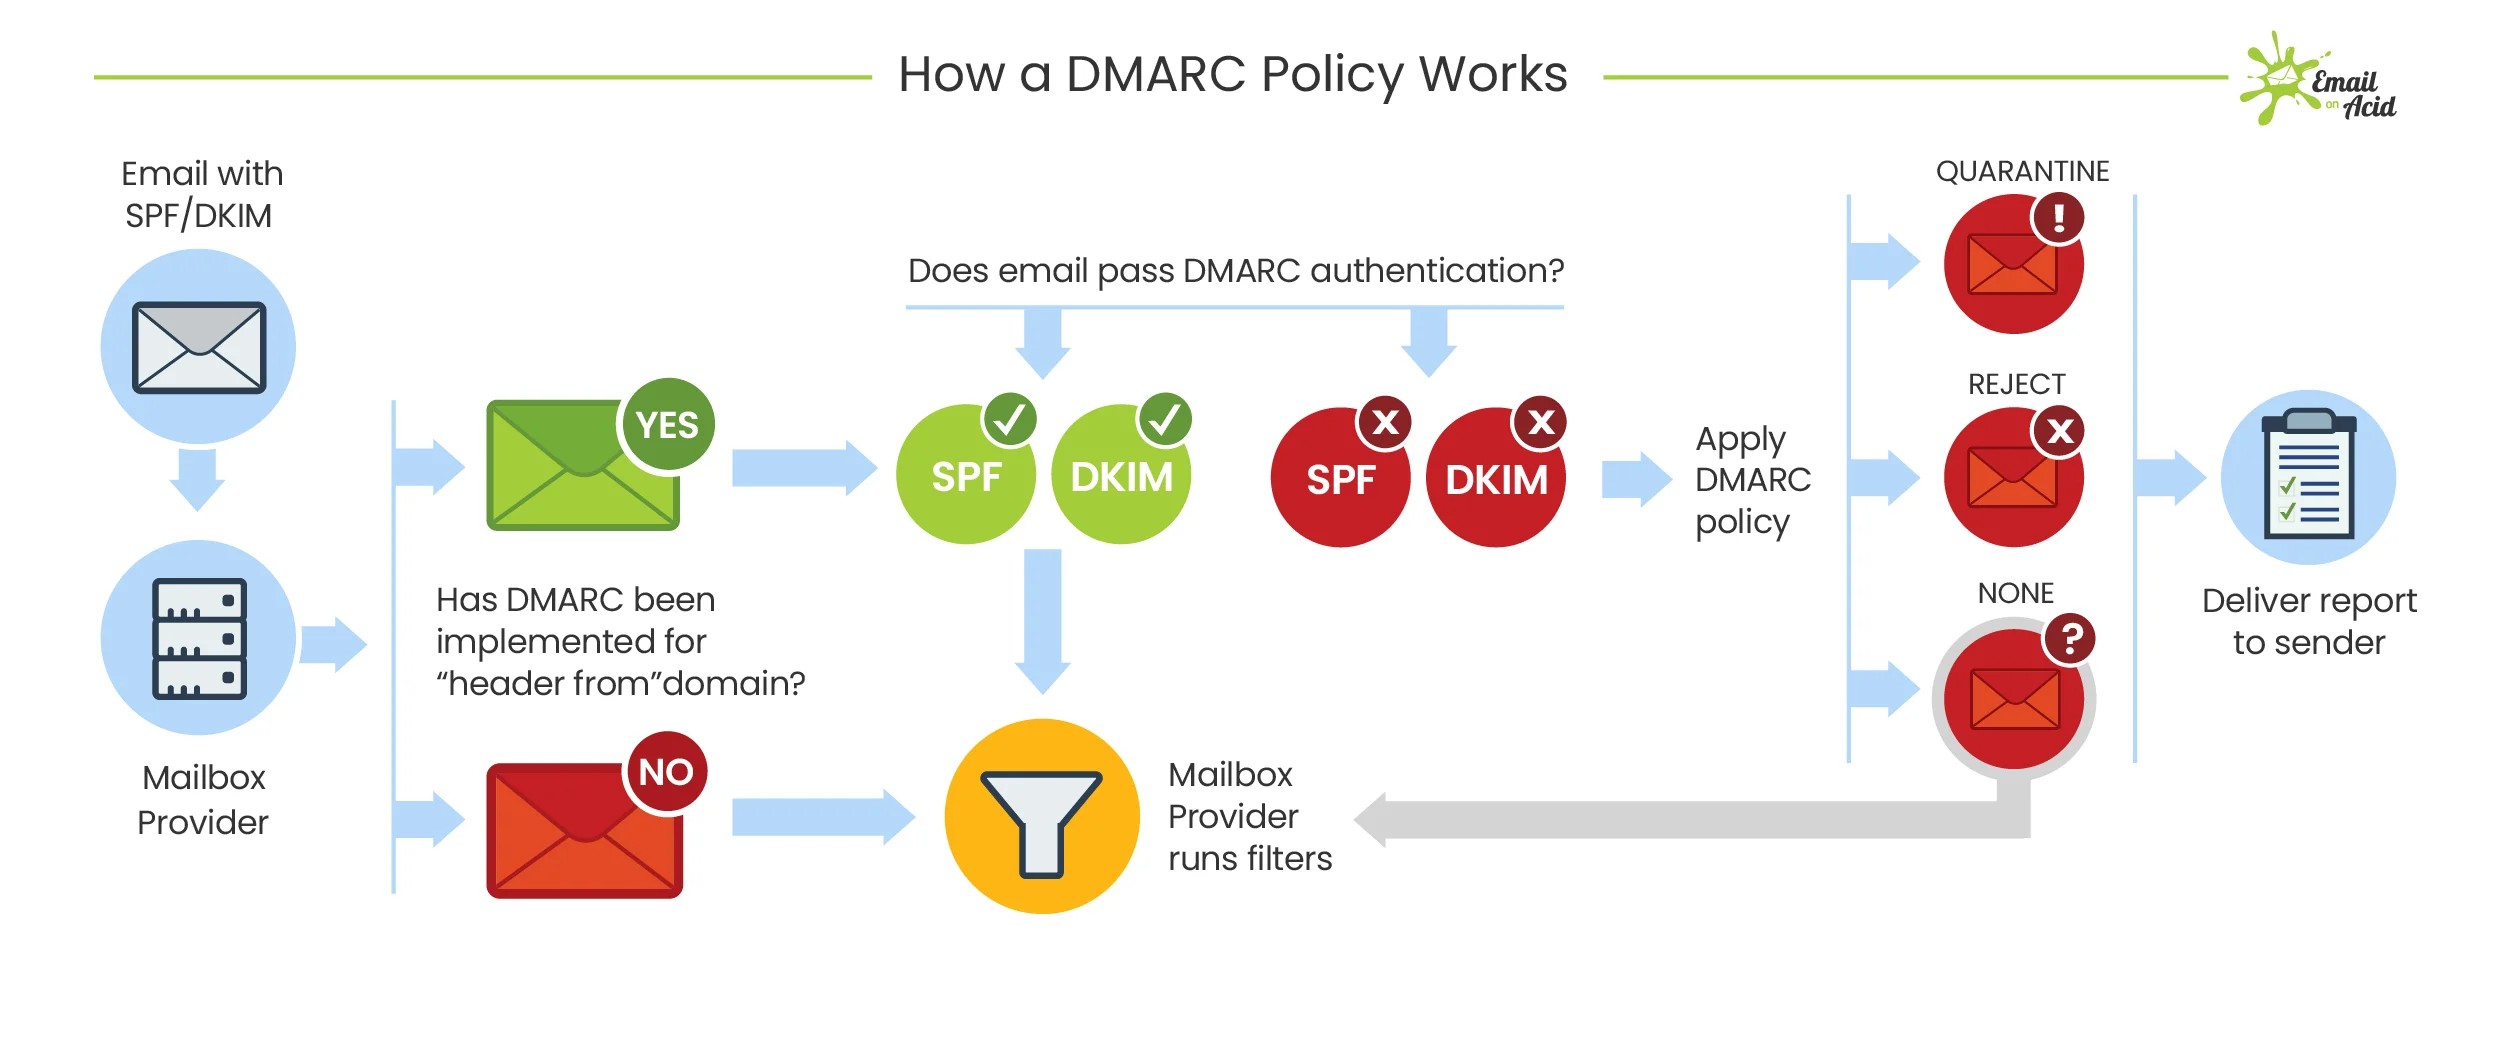
DMARC (Domain-based Message Authentication, Reporting & Conformance)
DMARC is like a bouncer at the door—it enforces your SPF and DKIM policies and tells email providers what to do if an email fails authentication.
👉 It helps prevent phishing attacks and improves email deliverability by ensuring that only legitimate emails from your domain get delivered.
How to Set It Up:
- Add a DMARC TXT record to your domain’s DNS settings.
- A simple DMARC policy might look like this:
- This means:
- If an email fails SPF or DKIM, quarantine it (move it to spam).
- Send reports to you@yourdomain .com so you can monitor any suspicious activity.
Thanks to Email on Acid for these images, check out their blog post from last year!
Step 3: Warm Up Your Email Domain Before Sending Campaigns
If your domain is new or hasn’t sent many emails, sending a large batch of emails all at once can trigger spam filters.
How to Warm Up Your Email Domain:
- Start sending small batches of emails (10-50 per day) and gradually increase volume.
- Encourage recipients to open, reply, and engage with your emails (engagement signals boost your reputation).
- Avoid sending mass emails to cold contacts—stick to engaged subscribers.
Step 4: Clean and Maintain Your Email List
A poor-quality email list is one of the biggest reasons emails end up in spam.
Best Practices for List Management:
- Remove inactive subscribers who haven’t opened your emails in 6+ months.
- Use double opt-in so that only people who genuinely want your emails subscribe.
- Avoid buying email lists—these often contain spam traps and hurt your sender reputation.
Step 5: Write Emails That Avoid Spam Triggers
Even with all the technical settings in place, poor email content can still land you in spam.
Tips for Better Email Deliverability:
- Avoid using spammy words like “Free,” “Urgent,” “Act Now,” and “100% Guaranteed.”
- Keep your email short and to the point—don’t overload with images or links.
- Always include an unsubscribe link (this is required by law).
- Personalize your emails—emails with recipient names perform better.
Step 6: Monitor Your Email Performance
Once you start sending campaigns, track your email performance to catch any issues before they hurt your deliverability.
Key Metrics to Watch:
- Open Rate: How many people open your emails? (Low open rates may signal spam filtering.)
- Bounce Rate: How many emails failed to be delivered?
- Spam Complaints: If users are marking your emails as spam, you need to adjust your strategy.
Quick Checklist: What to Do Before Sending Email Campaigns
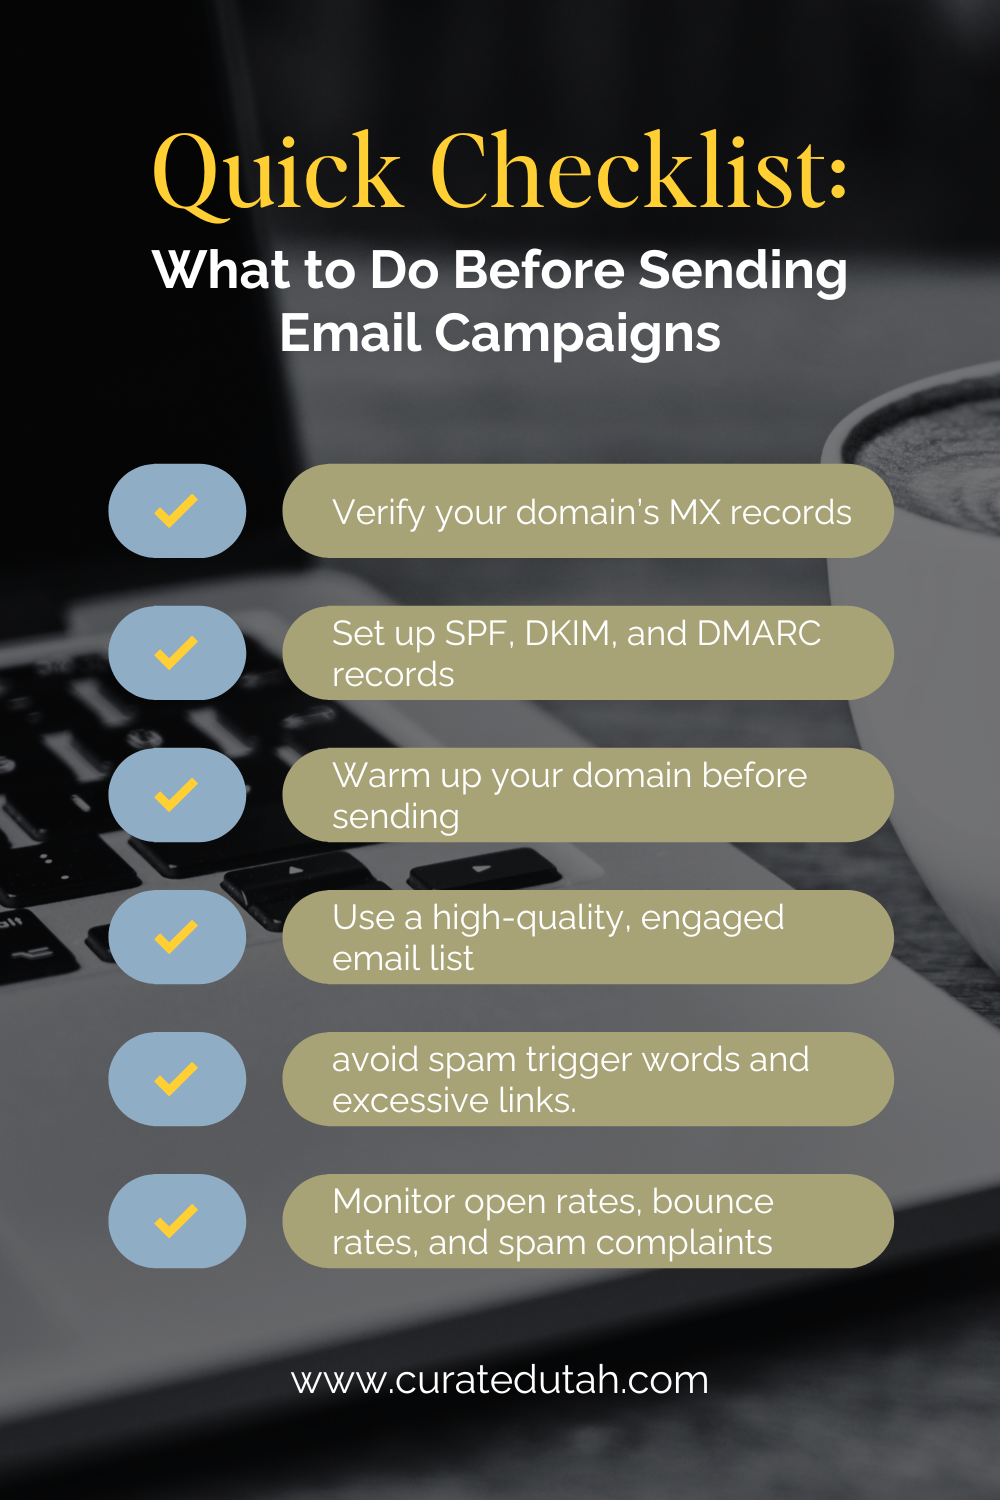
✅ Verify your domain’s MX records using Google’s MX Record Checker.
✅ Set up SPF, DKIM, and DMARC records in your domain’s DNS settings.
✅ Warm up your domain before sending large email campaigns.
✅ Use a high-quality, engaged email list (avoid buying lists).
✅ Write emails that avoid spam trigger words and excessive links.
✅ Monitor open rates, bounce rates, and spam complaints to adjust your strategy.
Don't miss a beat!
Weekly Tips, Tricks, and Analytics delivered straight to your inbox!
We hate SPAM too. We will never sell your information, for any reason.
